Monday, February 28, 2011

A Beautiful Day in the Neighborhood


Isn't this beautiful?

It's what I spent about an hour driving around the neighborhood today to find.

I knew it had snowed in the mountains yesterday, and it was bright and sunny here today, so I went 'sploring, looking for the best view of the snowy mountains. This is a photo of the Cuyamacas and Mount Laguna. They have received about 3 feet of snow since Thursday.

These mountain ranges are at least 50 miles east of me. And, you know what? That's as close to the snow as I'm willing to get these days! LOL

Lots of people headed up there in the past couple of days - and got stuck on the freeway, since the snow level here in SOCAL was down to about 1500 feet. They even closed the I-8 going east yesterday because there were so many people trying to get to the snow, and it was still snowing! They all caused a traffic jam. Bet the CHP just loved it all!

People who live here aren't used to driving in the snow! Nor do they know how to dress for it! I watched the news the other night and there was a guy in shorts and a t-shirt standing out in the snow, posing for the cameraman.

And here I sit, in my computer room, with a sweatshirt, a thermal shirt and a flannel shirt all layered - and I'm just toasty. And I'm nowhere NEAR the snow!

I could also see Mount Palomar (yes, where the famous telescope lives) to the north, as well.


Not a very good photograph - had to use the zoom and hold the camera up, so couldn't see the screen. Just pointed and shot!

Palomar is only about 35 miles away, so when it snows up there, it's easier to see it. Plus, it's really right in front of you as you head north on the I-15. The problem with being able to see it from the freeway is that you can't stop and take a photo!

I had the same problem with other places I could see the snow today, too. Just nowhere to pull over and take a shot.

So, while I enjoyed seeing a lot of glances at the snowy mountains, I wasn't able to get a lot of great shots!

By Wednesday or so, most of this snow will probably be melted - even though the air is cool, the sun is warm, and we don't normally get temperatures low enough to sustain snow for any length of time.

But it's beautiful to see it, isn't it?

No stamping to share with you tonight. I'm still plugging away at the family calendars. Have decided which pages are for which months and have been adding embellishments in that vein.

Just spent this evening printing out the remaining three copies of all (hopefully!) the photos I'll need to finish four calendars.

Now I get to cut them apart and trim them down, mount them, and adhere them to the 6x6 pages of DSP I've selected.

Then add embellishments and journaling to each page.

Then glue them on to the calendars, and write in the dates...

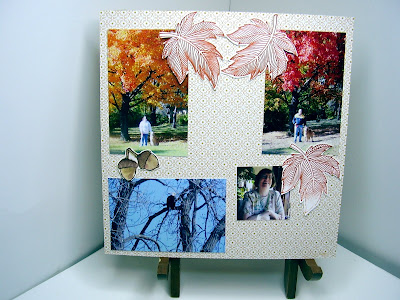
Oh heck - even if there's no stamping on it, here's another sneak peek of a partially completed page for the 2011 Family Calendar.


I'll show you the finished product for this page a little later.


Got any scrapbooking to do? Want to come to my Stampin' Garage and play for a while? Give me a call or an email to set something up!

Thanks for stopping by... Come back soon!

Sunday, February 27, 2011

More Sweet


Here's a third card using the Sew Sweet stamp set and DSP.

This one is a gift or business card holder. It measures 4 x 4.

And when you open it...


...there's your gift or business card holder, over on the right side.

I've placed a small scrap of Soft Suede to highlight the slot.

I like the use of the Pear Pizazz twill ribbon on the card, as well.

This year, the twill ribbon (aside from the ecru one we've carried for a while) is only available in the "In" colors.

And I like all the colors of this twill ribbon that I've played with. Soft, a convenient width. What more can you ask for?

=====

We had a storm here today - this is the coldest day we've had all year, and guess what I have blooming in my yard...

  • California poppies
  • Hyacinths
  • Watsonia
and... FREESIAS!

I LOVE freesias - I've got them stashed all over the place. Out front, in the flower garden in the backyard, in pots on the patio - and I never remember where I planted them, so it's always a pleasant surprise to recognize them when they pop up.

Wanna see?


A red and a white one here. And...

Yellow ones out in the flower bed...


Tonight it's supposed to get very cold (for here), so I picked all the freesias that were starting to open and brought them in the house. Then I went out and hung (hanged???) sheets in hopes of keeping my plants from freezing.

And then it rained again. So now I have cold wet sheets "protecting" the plants that I don't want to lose... Think that's good? Let's hope so!

Well, thanks for stopping bye - come back soon! And in the meantime, don't forget to ink a stamp!

Saturday, February 26, 2011

Sew Suite


This card is from my up line. She sends me a package of cards about every quarter - she's so good to me!

I like the color combo she used in this card. Crumb Cake for the card itself, decorated with Baja Breeze DSP and CS. She even added Baja Breeze seam binding.

And an idea I wouldn't have thought of - put a button on a button! Adds some nice dimension to the card.

Here's the fold of the card.


She started with an 11 x 4-1/4 piece of Crumb Cake CS and folded it in half.

Then she folded the front of the card in half (back towards the fold) and attached the Baja Breeze pieces, which are cut from the Sweet Stitches Designer Series Paper (DSP), and backed with Baja Breeze CS.

The verse on the inside was stamped with Early Espresso.

Easy peasy! And a lovely card, in the end...

Thanks for stopping by! Come back soon...

Thursday, February 24, 2011

Sew Detailed


Here's another swap card I got while at Leadership in January.

This one has a lot of details, that just add to the joy it will give the recipient!

The first one is that measuring tape! CUTE!

And, aren't those buttons cute!


They were made using the new Buttons embosslit. An embosslit dry embosses and cuts at the same time. All you do is put a scrap of card stock inside the embosslit and run it thru Mr. Big!

Open up the embosslit and plop those luscious buttons on whatever you want!

In this instance, though, the designer added some white gel pen to the button's holes to high light them! Adds a nice little touch.

And look at this one - I almost missed this one!


Adding more while gel pen to the feet of the dress form was brilliant!

And then we have the DSP that has buttons in it, as well, and everything pulls together very nicely!

That's one of the best things about Stampin' Up! product, as far as I'm concerned. How well the stamps, DSPs, and fabrics now mix, match, and coordinate!

I also like the fact that we generally have 3 or 4 current stamp sets that you can mix and match with other stamp sets and papers.

Are you a seamstress? If you are, I'm sure you'd love the fabrics. There are three different fabric patterns to each box. All are fat quarters, and all tear nice and straight! That in itself is a plus, when you work with fabric, because it means a straight bias, which is important so your fabric will lie flat.

So, did I tempt you with anything tonight? Anything you see that you HAVE to have? Give me a call or an email and I'll be happy to order it for you!

Thanks for stopping by - come back soon!

Wednesday, February 23, 2011

Family Calendar 2010 - 1 month done!

I know, I know - it's awfully late to be making calendars!

But it's become a family tradition for our family's calendars to run from February to February (and even March one year!) -- for several reasons.

The first reason is that it's like pulling teeth to get the photos to put ON the calendars! I start asking in October, and, IF I'M LUCKY, I'll get some by Christmas...

The second reason is that by the time I GET the pix, I'm either buried in Christmas stuff, or I'm on my way to Leadership in early January...

So, our calendars run from February to February. And, that's OK! Our 6 x 6 calendars are set up so you can make them for a year, starting in any month (Whew - Stampin' Up! must have known about my family and me, huh?! LOL).

The photo above is my first pass at this page. Before I can even start laying out the calendars, I have to cull photos (when I DO get the photos I have many to choose from!).

After I've selected photos, then I adhere them to the 6x6 DSP I've chosen to match them.

Next, I add some embellishments, remembering that I still have to add the journaling.


And after I've tacked these down, I add the journaling that will tell us all years from now why that photo was important.


I'll admit, scrapbooking isn't one of my passions. I only have those furry Kidz, and after they've passed the kitten stage, they can get pretty boring.

But I do enjoy scrapping the family photos on these calendars. It gives me a chance to really study them and sort of keep up to date with what's happening with them. They all live in the Midwest, and I'm on the West Coast, so we don't see each other very often.

I still have 4 copies of 11 more months to go, so I guess I should get busy! I'll share more of them as I get them closer to being finished.

Are you a scrapbooker? Stampin' Up! sells all KINDS of supplies you could use - just go to my website and check it out! When you're ready to order, you can either call or email and order, or enter it directly on line. Just remember to select me as your demonstrator to get preferred pricing!

Thanks for stopping by!

Tuesday, February 22, 2011

And the Point Is


This is a leftover from Valentine's Day that I haven't shared with you, for some reason.

It's the new Mr. Big die from the Occasions mini called Petal Cone (Item 121810).

This cone was actually made using TWO pieces cut using the die.

I used Cherry Cobbler CS (I LOVE, LOVE, LOVE this color! You NEED some!) for the main part of the cone, and then ran some Whisper White CS thru to make the scallops around the top.

The scallop piece is part of the die, but in some instances (like this one), I like the look of another color to give it some pop.

Before I put it all together, I used the "Bliss" stamp set (SAB - FREE with a $50 purchase!) and embossed with white embossing powder. I added some seam binding so I could hang this cone.

And then I stamped a Valentine greeting on a piece of Newsprint DSP, and adhered it to the little banner piece that is also cut on the die.

It's a little too long, so I sort of "furled" it when adhering it to the cone itself.

Wouldn't this make a really cute May Day gift - fill it with small flowers or candy and hang it on someone's door - and then run away! ha ha

Here's a close up so you can see it a little better.


I've been playing around with more than two of these Petal Cone die cuts and came up with something that looks like an upside down lampshade - I thought it would look cute with potpourri in it. Evidently I didn't take a photo of it so I could share it.

I'll post more pix of the things I've done with this die soon.

In the meantime - don't you need this die for YOUR Mr. Big?

Thanks for stopping by - come back soon!

Sunday, February 20, 2011

There She Is Again...


Yes, it's that cute little girl from Greeting Card Kids again.

This is another card I made for my long distance DL.

I was trying to combine a few new accessories on each card, so I MAY have gone a little over the top!

For this one, I used the Springtime Vintage DSP - I ran it thru the Tulips Embossing folder (you'll have to look closely!). I also lightly dabbed the embossed part with Rose Red ink, to make it stand out a little more.

I generally put a whole 5-1/2 x 4-1/4 sheet of DSP thru the embossing folder and then trim it and cut it in half, so I am able to get two cards from each piece.

I added a little of the Victoria lace. The Valentine Greetings (from Grateful Greetings - a great word set!) was embossed with white embossing powder on Rose Red CS.

And of course, last, but certainly not least, that little girl, who was stamped with black Staz-on on to watercolor paper, then colored with the Watercolor Crayons. She was then punched out with the scallop punch, and backed with a piece of Pear Pizazz CS cut with circle punch.

There are other images in the Greeting Card Kids set - Halloween, Christmas, and Back to School, which also includes a little boy image.

And the two characters are spread apart enough that you could easily cut them apart and use one or the other, if you wanted.

So, do you NEED Greeting Card Kids? If so, now's the time to purchase her, since it's Sale-A-Bration and FREE STAMPS! You'd need to add some to your order, since the wood mounted set is $20.95, but for each $50 in product you purchase during SAB, you get to choose one item from the SAB catalog!

Thanks for stopping by! Come back again soon...

Saturday, February 19, 2011

Thoughts of Spring


This is another card that I made for long distance down line.

For this one, I started with Pear Pizazz CS (LOVE that color!), stamped the "En Francais" background on one half, while covering the other half with some of the Springtime Vintage DSP.

Where they meet, I used the Rose Red seam binding - have I mentioned how much I LOVE this stuff?!!? It's a dream to work with!

I stamped the Happy Birthday with black Staz-on, and then plopped a few butterflies made Melon Mambo and the butterfly embosslit all over the place.

I thought this was an attractive, but generic birthday card. Rather simple, but that seems to be my style!

Thanks for stopping by!

Friday, February 18, 2011

Button, Button


Here's a card I made for one of my long distance down line members. I plugged a LOT of accessories on to this card, just playing around with the "new toys".

It all started with fabric and the new Bigz L die "Fun Flowers". I ironed adhesive backing to the fabric and ran it thru Mr. Big.

For the background, I used Newsprint DSP, stamped on it and grunged it up a bit.

I ironed the fabric flower on to the DSP, then glued it all to Crumb Cake CS.

I added some of those fun new pompoms in Melon Mambo, and one of the HUGE buttons from Sweet Stitches Designer Big Buttons. I threaded some linen thread thru the button before I adhered it to the CS.

I also added one of the Fabric Designer Brads - these are very lovely. They have satin like fabrics on them and blend really well with the Sew Sweet DSP and fabrics we're currently carrying.

I have some other cards I sent to the long distance down line, which I'll share at a later time.

In the meantime, thanks for stopping by!

Thursday, February 17, 2011

Candy Wrappers!

Isn't this cute?

It's made with the Candy Wrapper Bigz L die (Item # 120890 $32.95) which was in the Holiday mini.

I made this one from the Newsprint DSP that's in the Occasions mini and decorated it with hearts punched from the Glimmer Paper (the BOMB!!), also in the Occasions mini. I also stamped the string of hearts that's in the Valentine Defined set from the same catalog before I folded it into its shape.

Even though the die was introduced in the Holiday mini, it is still available to be purchased now. This is one of the carry over items we frequently have.

Most of the time, when you see a punch or a Big Shot die in a mini-catalog, you can be assured it will be available for purchase after the mini expires.

There's a lot of money involved in designing and manufacturing a punch or a die, so it makes sense for it to be available for quite some time after it's introduced.

I used this die a LOT for Halloween, since we were first introduced to it around that time.

I make treats for my Starbucks barristas for holidays - they give me excellent service every day, so I like to let them know that I appreciate it!

Here's a photo of my hand and the die, just so you can have some idea of its size - it's not very big!


This is one of the Halloween boxes I made.

For this one I used the Platinum Shimmer Paint and painted right on the spider web stamp. The paint is water based, so washes right off, once you're done!

And here's a tray full of them... It makes an attractive display, doesn't it?


I've also decorated them for Christmas, Thanksgiving, wedding favors, and the one at the top, for Valentine's day. I'm sure I'll be able to come up with something for Easter, as well - just haven't gotten around to that holiday yet!

Quite a versatile piece of equipment, wouldn't you say? And we LIKE versatile, don't we!!!?

Would YOU like one of these dies? All you have to do is call or email me to order it! And, if you add another item for at least $18 to your order, you'll receive a SAB item of your choice - for FREE!

I'm sitting by the phone awaiting your call!


Tuesday, February 15, 2011

Nixie's Fotos

I have a virtual friend (hey, girlfriend) I've met thru Farm Town. We chat for hours (and harvest each other's farms while doing that) and we know a lot about each other - but we've never met in person.

I hope we can remedy that one of these days!

A while back, I asked her to send me some of her favorite photos, and I proceeded to turn them into a litte scrap book for her.

It's made with -- are you ready? -- toilet tissue rolls!

I've made these and posted photos before, but it's been probably a year since I last did any.

Nixie loved it! And, as I'd hoped, it's small enough for her to carry it in her purse...

Wanna see?


Here's the outside of it.

It has 4 t.p. rolls total. I print my photos out 2" x 3" and they fit perfectly in this project.

And when it was done, I tied a zillion pieces of ribbon to the ring that binds it all together. You know - all those tails you have left over after you make a bow or decorate a card.

I also put front and back covers made from card stock, to protect the photos a little more - plus it gives me two more surfaces to decorate!

Here are a few more photos of her scrapbook...

Here's Nixie with her grandson.


And here's another of her grandson by himself. He was definitely looking up at something, so I added a bee to the page for him to look at.


And these are the fronts of the four inserts for the "pages". There are four additional photos on the other sides, as well.


It's a fun little scrapbook to make and fill.

Would YOU like to make one? Give me a call and let's set up a private lesson for you! It takes about 2 hours to make, without the photos...

=====

Hey, don't forget about Sale-A-Bration (SAB) ! It lasts a little longer this year, but before we can blink an eye, the end of March will be here and SAB will be gone for another year!

So, let me know what you'd like to order! I generally have an order to input each week, and would be happy to add yours. And, if you live in San Diego county, I even deliver!

Or, you can go to my website and place the order yourself and have it shipped directly to your home.

Whichever way you choose, be sure to get your catalog out and get that $50 order together so you can get FREE STAMPS!

Thanks for stopping by...

Monday, February 14, 2011

Those Kidz Again!


Anyone remember this?

It's a book I made using My Digital Studio (MDS) showing The Kidz when they were tiny babies. Weren't they cute??? (not that I'm the least bit prejudiced - hee hee)

Well, this is one PAGE of the book I made...

Stampin' Up! has released a whole catalog of the images that are available for download for use with MDS, and as I looked at the catalog (and realized how many of them I DON'T have), I was inspired to use MDS again.

I do a family calendar each year for my brother and two nephews (and families). And of course, I keep one for myself!

This year, in addition to the hand-made calendars I'll send them, I'm playing around with the new 6-1/2 x 5-1/2 size of calendar that was just released - and I'm LOVIN' how EASY it is to use this product!

I already knew that, but playing with it again reinforced that.

You can use the .jpg images in ANY software that will accommodate .jpgs. But MDS is SO EASY to use, and so inexpensive ($79.95), why wouldn't you just purchase this product and then add the newer images as you can afford to?

And the downloads are very inexpensive! They range anywhere from $.95 (!) to around $9.95, depending upon how many images are contained within the download.

The software comes with a TON of images, so if you never wanted to add to it, you'd be good to go for a long time.

The book for The Kidz used some of the images that were already set up.

All I had to do was drag and drop the photos into the picture boxes, add some journaling, and I was done!

But of course, I couldn't stop there. I added some additional images, which are included in the program for which we DON'T EVEN HAVE STAMPS!

How's THAT for a deal? Pretty hot, is what I'd say!

Here's another page from their book:

I started with square boxes for all the photos and was able to make some of them circles with the click of a button! On this page, I also added the background paper, many of which are contained in the original software, others which are available to be downloaded.


And we mustn't forget Ms. Velvet... This page is from a book I started playing with, but which I've never sent off to be made up. One of these days, I will though!

If you're interested in My Digital Studio, be sure to check out the website that has been set up strictly for you and MDS! You can post questions, photos, projects - whatever you'd like there.

And for those of you who use MACs - it works REALLY well on them, too (I'm a MAC person, so that was a REALLY important feature to me).

http://mydigitalstudio.net/

And when you're ready to purchase it, please go to my website to do so!

http://www.samslimak.stampinup.net

Remember to select me as your demonstrator to get preferred pricing!

Saturday, February 12, 2011

Resist(ance) is Futile

Today was our monthly Stamp Club meeting. These ladies come to my Stampin' Garage on a monthly basis to PLAY!

They've become friends through stamping, which I think is awesome!

I generally try to teach them a technique each month, and then encourage them to take the technique and turn it into a full card. They have access to all my stamps, inks, and papers the the Stampin' Garage.

The technique I taught this month is called Emboss Resist.

Pretty simple technique to do.

Basically: Stamp w/Versamark, emboss with clear embossing powder.


And then use a sponge to rub ink OVER the embossed image.


The ink will stick where there is no embossing, and the embossed portion will continue to show the original card stock color through it. I used Real Red to sponge this version of the "Love" stamp.

Darker colors tend to show off the embossed image better.

This one was made by embossing the Medallion stamp, sponging it with Rich Razzleberry Ink.

Then I dug around and found some old DSP that matched it pretty well, and added a 1/4" Rich Razzleberry taffeta ribbon to cover where the two papers meet.

I stamped the "Just for You" from the Level 1 Hostess set from the big catalog, "Afterthoughts" .

There's actually more on the "just for you" stamp, but I chose to just use those words for this card. The rest says "...so you don't have to share".

Oh - and did you see them? Those awesome pearls - AGAIN?!!?

Go ahead, scroll back up and try to find them. I'll wait...

This technique works best with more solid images, but I also played around with one of the background stamps:

This one is Bella Toile, sponged with Pacific Point.

And here's my version of the card that let me down this emboss resist path this week. I copied it from Kimberly van Diepen's blog (thanks, Kimberly! Love your style).


Lots of soft colors here. I used Baja Breeze and Ivory CS, and sponged with both Baja Breeze and Soft Suede.

And of course, added the Crumb Cake seam binding.

I gotta tell ya - I just LOVE that seam binding - it's so thin, soft, and pliable and doesn't create huge knots when you use it on a card. And now we carry it in 7 different colors!

Hope you had a beautiful day! It certainly was here - like 75 degrees with lots of sun. It felt great to open up the house and air it all out!

Thanks for stopping by. Come back!

Thursday, February 10, 2011

Trinkets from the Heart

This was one of the displays we got the opportunity to see while we were at Leadership in Nashville last month.

Isn't it pretty?!!?

It's made up entirely of trinkets from the Occasions mini-catalog, which is in effect from NOW until April 30, 2011.

NOW is also Sale-A-Bration (SAB) - and when you make a $50 purchase (before shipping/handling and tax) NOW - you get to choose an item from the SAB mini-catalog!

LOTS to choose from, too - from stamps, to ribbons and buttons, to adhesive backed die cuts - even a DVD with images from SAB on them so you can use it with your My Digital Studio! Or, these images can be used with any other product that allows the use of .jpg files, should you have some.

The trinkets used in the heart are all located on page 24 of the Occasions mini. They include crowns, keys, and baubles in 4 colors.

And besides looking awesome in this heart shaped display, they're perfect for adding to jewelry you might have, or used with our Simply Adorned line of jewelry products (bracelets, necklaces, charms for each), as well.

This display was made by a Stampin' Up! employee - I don't know which one, but I think it's very cleverly done, don't you?

How can I help you with your stamping needs? Give me a call and let me know!

Thanks for stopping by...