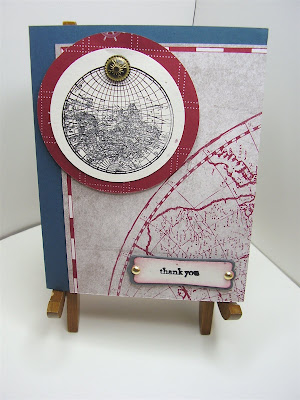
Here's another of the cards I made using The Open Sea and the Nautical Expedition DSP.
I used a couple of Mr. Big dies for this one.
The first one is the 3" circle die. I'm so glad we're now carrying that size, as well as the 3-1/2" die. They're great for making additional layers for the new large 2-1/2" circle punch that's in the current mini-catalog.
The other die I used is the one for the little tag, called Modern Label. It's one of the additional dies you can purchase to use with the Movers & Shapers die.
The best part about these additional dies is that they're JUST enough larger than the punches we carry, to make a nice layer, too.
The additional dies are available in two packages. One is comprised of Holiday dies - it's called Holiday Windows (Item 116821 $29.95) and the pieces coordinate with the Ornamental punch, the 1-3/4" punch and the Sweet Treats circle cups. The fourth die is shaped like a dove.
The die I used for this card is in a set called Punch Windows (Item 115953 $29.95). The set coordinates with the Scallop Oval, Modern Label, Full Heart and Star punches we carry.
These dies are carried on page 209 of the Idea Book and Catalog.
I also used one of the Antique Brads on this card.

I used the Modern Label punch and die on this card as well.
And to add a little visual interest, I tied some of the Espresso & white Baker's twine we'll be carrying around the stamped image of the anchor, then layered it on to a piece of Cherry Cobbler CS that I ran through the Polka dot embossing folder.
When I add a layer of DSP to a card, I like to leave some of the base CS visible for contrast.
I just cut the DSP to the normal 5-1/2" x 4-1/4", then trim a 1/4" off both the long and the short side. Yes, it gives me small pieces of DSP to deal with, but it's just easier to cut it while I'm working on the card (and finally decide WHICH piece I'm going to use!) and deal with those scraps.
Sometimes I use them. They do look very effective when you weave 6 or 8 of them and attach them to cards. Cute little back drop for another image.

This last card has quite a few layers!
Somehow, while working on it, it just seemed to need all those things!
I used the Espresso and white Baker's twine again and the Modern Label die.
I cut quite a few of those label dies last night - so now I have a few more to play with.
I just put them into the little boxes that hold my UFOs (unfinished objects!) and can access them later to use on other cards!
If you don't have something to hold YOUR UFOs, you should consider it.
They tend to end up all over my work bench, so every once in a while, I have to scavenge and round them up! And then I have to take the time to sort them every once in a while.
It's amazing how many of these can pile up in a short timeframe! Punch shapes I didn't use, images I stamped, but never got around to putting on a card.
Another thing that I seem to amass are pieces of CS that I've run through embossing folders. They're good to have in your UFO box, too - sometimes it's EXACTLY what you need to finish off a card.
I hope you've enjoyed the Sneak Peek cards I had the fun of pulling together this week.
I love having a "mission" when stamping - helps to keep me focused! I do have a tendency to go off on tangents when there's no real goal in mind!
If you've seen something you'd like to order, you can either go to my website to place your order, or give me a call or send email!
Just remember, these Sneak Peeks I've shown you the past two days have items that won't be available for you to order until May 1st!
Thanks for stopping by - come back soon!

No comments:
Post a Comment