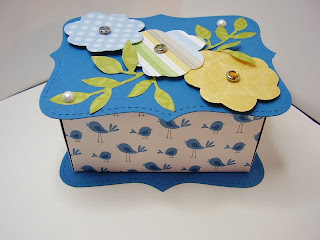
Since this was our last meeting for this catalog year, we had a Pot Luck after we played - er, stamped.
They all got to see the new "In" colors (general consensus - they LIKE 'em!), they got to glance thru the new catalog. No one really got to spend a lot of time with the catalog, so there weren't any comments, but, trust me, it's beautiful!
I'll start new clubs in July - would you like to join us? We make projects, learn new techniques, learn new card templates, play with the Big Shot... I try to include something for everyone's interest over the club's length, as long as I'm aware what that interest might be!
When cleaning out in the garage, I keep running across things we did years ago - and will be bringing some of those ideas out of retirement this coming year - as well as trying to stay on top of the newest trends.
Here are photos of the project everyone did today. It's called a Top Note box, made with CS and/or DSP. It will hold 3x3 cards very nicely. If you'd like directions to make this project, leave me a comment, along with your email address!
Aren't they all beautiful?
 This is Sylvia's.
 Bernadette's
 Anne's
 Angela's
 Irene's
 Del's
Del'sSmashing jobs, Ladies!
=====
Last time I blogged, I talked about cutting layers 1/4" or 1/2" larger than the previous one.
As someone who does better with visual aids, I realized photos would show the concept of borders better.
Here are 5 different sized squares. Notice how much larger the Real Red square (bottom layer) is than the Green Galore (top layer). It's over an inch larger (specifically 1-1/8" larger).
 There is only 1/8" difference between the 1-3/8" (green) square and the 1-1/2" (i.e. 1-4/8")(Rust) square. This will give a VERY narrow border for the centerpiece (the Green Galore piece).
The next three squares were increased by 1/4" each (1-1/2",1-3/4", and 2") (Rust, Caramel & Turquoise).
Finally, the Real Red square was cut 1/2" larger then the next smaller one (Turquoise).

In this photo, I've layered them so you can see how wide the borders will be, as well as the sizes of the squares.
 And here I've layered them as they might appear on a card. Now it's even more apparent how wide the borders will be between the different layers.
I hadn't glued these together (wasn't really done playing with them!), so the layers aren't straight, but I hope you get the jist...
And finally, The Kidz...
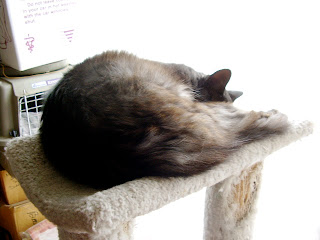
 Melie had a really tough day today - he couldn't take his usual nap on my chair out in the garage (the ladies were out there!), so he collapsed on the scratching post...
 After he woke up from his nap, he had PLENTY of energy to play with my ribbons, though. Devil boy!
 Smudge did her share of sleeping on the scratching post today, too. It was a good day for it - it drizzled again!
Right after I took the photos, I joined them - me on the couch, they on the scratching post. Great afternoon for a nap...
Hope you find time for a short nap sometime this weekend!
Sam
Love those cute boxs!!! Have to make some.. added you to my blog... can you send directions? Thanks.. Connie in NM (prairiestamper@gmail.com)
ReplyDeleteSam
ReplyDeleteI just loved those boxes!! I miss your stamp club. Can you send me those directions? My girls just graduated!!! They are finally grown and onto their own lives. I hope we can work out that college thing. Your open house in July, can I come if I'm free? I am in Chicago now. My real Dad turned 75 and my brother sent me here for his present.It is good to see him but not feel the weather. HOT HOT and humid!!!
Thanks for keeping me on your list of e-mailers.
Linda