Hi!
Just wanted to post a reminder that my December Christmas Card Stamp A Stack is coming up!
You'll be making 12 cards (with envelopes) at this event. Three each of 4 different designs. I'll be leaking some sneak peeks as we get closer to the dates.
The fee for the class is $25.00.
When you register using the PayPal button below, please tell me which date you want to attend. Registration must be received by 12/1/09.
Hope you're planning on attending! Can't wait to see your smiling faces!
Dates:
Saturday, December 5, 2009 @ 10 AM
Sunday December 6, 2009 @ 1 PM
Monday, November 9, 2009


Sunday, November 8, 2009
Details, Details
It really is the details that make something stand out from others of its kind.
Take cards, for instance.
I recognized recently that I'm a very basic card maker. I look at cards on other's blogs and realize that my mind just doesn't get that detailed when I dream up a card.
Not that there's anything wrong with that!
But it did make me realize that I struggle with adding the details to cards.
There are times when I whiz through the card making process, and the ideas are just FLOWING. When that mood strikes, I try to take advantage of it, and make as many as I possibly can.
And then I let them sit and "muddle".
I leave them out somewhere so that I see them often. I cogitate on whether or not they're "done".
Is there anything more that I can do that will ADD to the card, without becoming too much?
In the past, many times - I've realized I should have stopped before I added that last piece, or color, or detail. In my eye, by this time, the card is no longer as attractive.
So, I now take the card making process a little more slowly.
Cards might sit out in my stampin' garage for a week or two before it'll hit me what that last tiny little detail is that will make it a GREAT card.
I was blog-hopping the other day and ran across a sample where they'd used paper piercing as the detail on their card. And I realized I haven't pulled those tools out in quite a while.
So I did!
And here are the results:

 I papered pierced this rooster a while back and had it in my "parts" bin.
I went thru my entire collection of current samples and there wasn't ONE SINGLE sample that had been paper pierced! But I had this left-over from last year's catalog, so decided to start with it.
Here, the addition of a third layer of CS, also paper pierced, adds more visual interest.
I'm not sure why the colors in the two photos is so different! Both were taken using the same set-up - and, yes, they are the same card, with some minor variations! The card on the left is more true to color than the one on the right.
This one started out as an experiment with our new Shimmer Paints.


I dabbered the paint on to the snowflake stamps and stamped on the Hunter CS.
Then I sprayed the CS with some Shimmer Paint mixed in with a little rubbing alcohol. It comes out BEAUTIFULLY! Such a nice little touch.
The paper piercing on this card is around both the piece with the trees and the greeting.
Try this method for yourself, if you're having trouble adding those details - pull the cards together (but don't glue them down tightly!), and let them "muddle".
Maybe it's what your brain (and creative process) needs too!
=====
The Kidz were helping me again last night. They've both now learned that the best place to get my attention is out in the stampin' garage. So, one or the other of them is always in MY chair!
And remember I told you they don't both fit on a single chair any longer?
Well, they figured out a way! And now they're BOTH sitting in MY chair!


They're so fun to have around - never a dull moment!
Keep on stampin'!

Take cards, for instance.
I recognized recently that I'm a very basic card maker. I look at cards on other's blogs and realize that my mind just doesn't get that detailed when I dream up a card.
Not that there's anything wrong with that!
But it did make me realize that I struggle with adding the details to cards.
There are times when I whiz through the card making process, and the ideas are just FLOWING. When that mood strikes, I try to take advantage of it, and make as many as I possibly can.
And then I let them sit and "muddle".
I leave them out somewhere so that I see them often. I cogitate on whether or not they're "done".
Is there anything more that I can do that will ADD to the card, without becoming too much?
In the past, many times - I've realized I should have stopped before I added that last piece, or color, or detail. In my eye, by this time, the card is no longer as attractive.
So, I now take the card making process a little more slowly.
Cards might sit out in my stampin' garage for a week or two before it'll hit me what that last tiny little detail is that will make it a GREAT card.
I was blog-hopping the other day and ran across a sample where they'd used paper piercing as the detail on their card. And I realized I haven't pulled those tools out in quite a while.
So I did!
And here are the results:

 I papered pierced this rooster a while back and had it in my "parts" bin.
I went thru my entire collection of current samples and there wasn't ONE SINGLE sample that had been paper pierced! But I had this left-over from last year's catalog, so decided to start with it.
Here, the addition of a third layer of CS, also paper pierced, adds more visual interest.
I'm not sure why the colors in the two photos is so different! Both were taken using the same set-up - and, yes, they are the same card, with some minor variations! The card on the left is more true to color than the one on the right.
This one started out as an experiment with our new Shimmer Paints.


I dabbered the paint on to the snowflake stamps and stamped on the Hunter CS.
Then I sprayed the CS with some Shimmer Paint mixed in with a little rubbing alcohol. It comes out BEAUTIFULLY! Such a nice little touch.
The paper piercing on this card is around both the piece with the trees and the greeting.
Try this method for yourself, if you're having trouble adding those details - pull the cards together (but don't glue them down tightly!), and let them "muddle".
Maybe it's what your brain (and creative process) needs too!
=====
The Kidz were helping me again last night. They've both now learned that the best place to get my attention is out in the stampin' garage. So, one or the other of them is always in MY chair!
And remember I told you they don't both fit on a single chair any longer?
Well, they figured out a way! And now they're BOTH sitting in MY chair!


They're so fun to have around - never a dull moment!
Keep on stampin'!

Thursday, November 5, 2009
A Couple of Easel Cards
Hi Everyone
I'm still putzing with my One Sheet Wonder cards, but don't have any more ready to show yet - maybe tomorrow...
In the meantime, I thought I'd just post some photos of other items I've made recently. Hopefully, it'll help spark your creativity.
I find I sometimes have to look at another person's work in order to get my own mojo working - or I have to do something besides stamping, in order to get some new ideas to try with my stamps. There's something about this process that helps your own creativity get moving.

This card came about because of the OSWs I've been working on. The pieces were just sitting on the stamping table, and suddenly I knew they needed to GO together.
Below is an Easel Card. I saw the idea on someone's blog ( Sandi McGiver's?), which led me to Split Coast Stampers, where I got the pattern.

But it's a really easy pattern! Cut CS 4" x 8", score & fold at 4", then again at 2" from one end.
Then you'll need to cut another piece 4"x4", which you'll glue to the END fold of the card.

Here's the card from a different angle. Now can you understand why it's called an Easel Card? You prop the top of the card up against the layered piece on the INSIDE of the card, and it creates it's own easel! But it folds flat for mailing. Very clever idea!
And here it is opened, so you can see the folds.

I chose to use the Good Cheer set (# 115326) for my first attempt. The Santa and Reindeer piece fit the 4x4 size perfectly! And, besides, I'd just gotten the stamp set and it was CRYING to me to ink it up and use it! ha ha
Here's a Christmas card I made using this year's In colors.
It occurred to me that, although I really LIKE this year's In colors, I haven't been using them much, since starting down the Christmas path. So I challenged myself to make this card, using the Easel Card idea.

This is a different orientation for the Easel Card, but it still works.
I used the Level I Hostess set from the Holiday mini-catalog (did you notice there are TWO additional Hostess sets available in the mini-catalog?)
The set is titled Patterned Pines. I used Dusty Durango for the trees and popped them up with dimensionals. The star is stamped in Crushed Curry, the flower pieces in the corners are Rich Razzleberry, and the greeting was stamped in Bermuda Bay. The CS is Soft Suede.
Isn't it interesting how green it looks here? This CS does change colors somewhat, depending upon the other colors you've paired it with.
Here's a close up of the pieces I stamped, then cut out to create the "prop" for this card.

I want to remind you about my upcoming Christmas Stamp A Stack - Saturday, December 5th @ 10 AM and again Sunday, December 6th @ 1 PM Fee for the class is $25, and you'll make 12 cards - three each of four different designs.
Call or email today to reserve your spot!
Hope you saw something that sparked your creativity here tonight! Let me know what you think of my Christmas card done in the In colors - one friend looked at the card and turned up her nose. What do YOU think?

I'm still putzing with my One Sheet Wonder cards, but don't have any more ready to show yet - maybe tomorrow...
In the meantime, I thought I'd just post some photos of other items I've made recently. Hopefully, it'll help spark your creativity.
I find I sometimes have to look at another person's work in order to get my own mojo working - or I have to do something besides stamping, in order to get some new ideas to try with my stamps. There's something about this process that helps your own creativity get moving.

This card came about because of the OSWs I've been working on. The pieces were just sitting on the stamping table, and suddenly I knew they needed to GO together.
Below is an Easel Card. I saw the idea on someone's blog ( Sandi McGiver's?), which led me to Split Coast Stampers, where I got the pattern.

But it's a really easy pattern! Cut CS 4" x 8", score & fold at 4", then again at 2" from one end.
Then you'll need to cut another piece 4"x4", which you'll glue to the END fold of the card.

Here's the card from a different angle. Now can you understand why it's called an Easel Card? You prop the top of the card up against the layered piece on the INSIDE of the card, and it creates it's own easel! But it folds flat for mailing. Very clever idea!
And here it is opened, so you can see the folds.

I chose to use the Good Cheer set (# 115326) for my first attempt. The Santa and Reindeer piece fit the 4x4 size perfectly! And, besides, I'd just gotten the stamp set and it was CRYING to me to ink it up and use it! ha ha
Here's a Christmas card I made using this year's In colors.
It occurred to me that, although I really LIKE this year's In colors, I haven't been using them much, since starting down the Christmas path. So I challenged myself to make this card, using the Easel Card idea.

This is a different orientation for the Easel Card, but it still works.
I used the Level I Hostess set from the Holiday mini-catalog (did you notice there are TWO additional Hostess sets available in the mini-catalog?)
The set is titled Patterned Pines. I used Dusty Durango for the trees and popped them up with dimensionals. The star is stamped in Crushed Curry, the flower pieces in the corners are Rich Razzleberry, and the greeting was stamped in Bermuda Bay. The CS is Soft Suede.
Isn't it interesting how green it looks here? This CS does change colors somewhat, depending upon the other colors you've paired it with.
Here's a close up of the pieces I stamped, then cut out to create the "prop" for this card.

I want to remind you about my upcoming Christmas Stamp A Stack - Saturday, December 5th @ 10 AM and again Sunday, December 6th @ 1 PM Fee for the class is $25, and you'll make 12 cards - three each of four different designs.
Call or email today to reserve your spot!
Hope you saw something that sparked your creativity here tonight! Let me know what you think of my Christmas card done in the In colors - one friend looked at the card and turned up her nose. What do YOU think?

Tuesday, November 3, 2009
One Sheet Wonder - Revisited
About a week ago, I showed you how to make a One Sheet Wonder (OSW): Stamp an entire sheet of neutral cardstock (CS) with lots of images, and cut it up to create up to 16 cards.
I showed you a few of the quick ideas I'd come up with, and promised step them up and show them to you again.
So, without further ado:
Before and After:


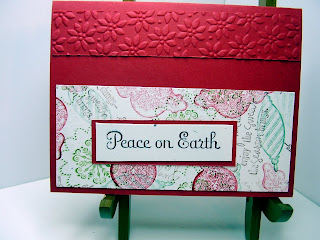
Not much change - just added the ribbon and stamped some background images using the VersaMark pad. But it was enough to pull the card together.


For this one, I used the spiral punch on the left edge, glued a small scrap of Real Red underneath, and added the Happy Holidays. I also mounted the center piece askew, to give the card more visual interest.

The addition of a single piece of ribbon to this card helped pull it all together.
Simple changes, but they make a difference.
Last night I showed you a glass block that I'd decorated with Decor Elements and commented that it needed a bow:
 What do you think?
Doesn't it have more "gift appeal" this way?
The Kidz were helping me while I worked on the OSW cards tonight:

They look REALLY interested in whatever I was doing, don't they?
Thank goodness your attention span is a little longer!
Thanks for coming by and visiting... Happy stampin'!

I showed you a few of the quick ideas I'd come up with, and promised step them up and show them to you again.
So, without further ado:
Before and After:


Not much change - just added the ribbon and stamped some background images using the VersaMark pad. But it was enough to pull the card together.


For this one, I used the spiral punch on the left edge, glued a small scrap of Real Red underneath, and added the Happy Holidays. I also mounted the center piece askew, to give the card more visual interest.


The addition of a single piece of ribbon to this card helped pull it all together.
Simple changes, but they make a difference.
Last night I showed you a glass block that I'd decorated with Decor Elements and commented that it needed a bow:
 What do you think?
Doesn't it have more "gift appeal" this way?
The Kidz were helping me while I worked on the OSW cards tonight:

They look REALLY interested in whatever I was doing, don't they?
Thank goodness your attention span is a little longer!
Thanks for coming by and visiting... Happy stampin'!

Monday, November 2, 2009
Well, It's Over...
... Halloween is --- for this year... Did you have a lot of Trick or Treaters? Did you go to a Halloween party this year? Was it fun? What did you dress up as? I'd love to hear about your Halloween - leave me a comment!
I spent mine sitting outside with my neighbors so we could be a "one stop" candy shoppe... We got quite a few kids this year, mostly younger kids (i.e. less than 2nd grade). I'm not sure they even understand what it's all about, yet, but they look so cute in their costumes.
And it was comforting to see whole families trick or treating this year, with a lot of the parents dressed up, too. In many instances, it appeared to be groups of parents who just happened to have kids to take trick or treating! LOL
Anyway, it was fun for all involved.
=====
How about this for a Christmas home decor idea?


It's a clear glass block that I picked up at a local hardware store, and to which I applied Definitely Decorative Decor Elements Holiday Mix (page 30 in the Holiday min-catalog) in red (# 117675).
This would be a nice decorative item to sit out through the holidays. Maybe you have room on a mantle or a table. Or maybe it would look good on your porch or patio. This one could even be left out all winter, since it says "Snow".
It needs a bow yet, but I didn't think of it before I photographed it.
Or it would look stunning with lights inside it - those little white lights. There are a lot of ways you could "step up" this idea to make it your own.
And here are the same Holiday Mix Decor Elements applied to a mirror I picked up at Big Lots. I paid $5 for the mirror. Look how adding the Decor Elements dresses it up for the holiday.

When the holidays are over, you can just peel off these pieces, and re-decorate the same mirror for the next holiday!
This time I used the White (# 117676). The price for each of these is $9.95.
These also come in Black, or Chocolate, and are so easy to apply! There are 25 pieces in each set, and would easily mix and match among colors to add even more versatility.
There are a lot of other vinyl rub-ons available in this product. There are items for your kitchen, your bathroom, your living room, or a hallway -- even items for your kids' bedrooms (or your own!).
And remember the family ones (3 cats and a kid) that I put on the back window of my car?

Just click on the Definitely Decorative catalog on the left side bar to check the rest of them out. Let your imagination run wild with your own creative ways to use this product.
And then call me and let me know what I can order for you. Or go to my website and place an on-line order.
If you'd like a real catalog (vs. a virtual one), give me a holler and I'll get one to you.
In the meantime, look at that catalog and let your imagination run wild!

I spent mine sitting outside with my neighbors so we could be a "one stop" candy shoppe... We got quite a few kids this year, mostly younger kids (i.e. less than 2nd grade). I'm not sure they even understand what it's all about, yet, but they look so cute in their costumes.
And it was comforting to see whole families trick or treating this year, with a lot of the parents dressed up, too. In many instances, it appeared to be groups of parents who just happened to have kids to take trick or treating! LOL
Anyway, it was fun for all involved.
=====
How about this for a Christmas home decor idea?


It's a clear glass block that I picked up at a local hardware store, and to which I applied Definitely Decorative Decor Elements Holiday Mix (page 30 in the Holiday min-catalog) in red (# 117675).
This would be a nice decorative item to sit out through the holidays. Maybe you have room on a mantle or a table. Or maybe it would look good on your porch or patio. This one could even be left out all winter, since it says "Snow".
It needs a bow yet, but I didn't think of it before I photographed it.
Or it would look stunning with lights inside it - those little white lights. There are a lot of ways you could "step up" this idea to make it your own.
And here are the same Holiday Mix Decor Elements applied to a mirror I picked up at Big Lots. I paid $5 for the mirror. Look how adding the Decor Elements dresses it up for the holiday.

When the holidays are over, you can just peel off these pieces, and re-decorate the same mirror for the next holiday!
This time I used the White (# 117676). The price for each of these is $9.95.
These also come in Black, or Chocolate, and are so easy to apply! There are 25 pieces in each set, and would easily mix and match among colors to add even more versatility.
There are a lot of other vinyl rub-ons available in this product. There are items for your kitchen, your bathroom, your living room, or a hallway -- even items for your kids' bedrooms (or your own!).
And remember the family ones (3 cats and a kid) that I put on the back window of my car?

Just click on the Definitely Decorative catalog on the left side bar to check the rest of them out. Let your imagination run wild with your own creative ways to use this product.
And then call me and let me know what I can order for you. Or go to my website and place an on-line order.
If you'd like a real catalog (vs. a virtual one), give me a holler and I'll get one to you.
In the meantime, look at that catalog and let your imagination run wild!

Thursday, October 29, 2009
Digital Paper Crafting
Stampin' Up! recently released a digital paper crafting product called MY DIGITAL STUDIO.
It was released to you, our customers, starting October 1, 2009. Do you have it yet?
It's awesome!
Here are some of the 8" x 8" pages I've created using one of the Simply Scrappin' kits that are included in the software.
I inserted the photos and rounded them; added journaling to the layouts. And while playing with the various stamp sets included in the software, I found the cat silhouettes.
You can't even buy these cat images in rubber!


These pages are pretty much as they're provided.
The book was very quickly pulled together (but that's another story) and I was extremely pleased with the outcome!
And below are some pages I created in a 5" x 5" format, using templates provided in the software.


For this book, which was my first attempt at playing with the product, I concentrated on layout and learning how to manipulate the background papers and card stocks provided.
On some of the pages (none included here, unfortunately), I added a few embellishments - ribbon, bows, brads, eyelets, punch shapes - all included in the software!
I also rounded photos, deleted photo placements, or replaced them with something else, like journaling areas.
In general, I was just getting to know the product. And I have to say I'm very pleased with the ease of using it!
Hope you've enjoyed these snippets of what I've been doing with My Digital Studio.
This is only the tip of the iceberg!
You can make calendars, or cards, or create books/pages with video and audio embedded!
Stuff that's way beyond my ken right now, but which I'll be playing around with!
That's why it's being call Digital Paper Crafting - very versatile.
OH - and did I mention? It's both MAC and PC compatible! That's a BIG woo hoo from a MAC user!
The price is $79.95 plus shipping/handling and tax. That's quite inexpensive in terms of software. And the fact that it's both MAC and PC compatible is a huge bonus for those of us on "the dark side".
Let me know when you're ready to take the plunge and try it out! I'll be happy to order it for you!

It was released to you, our customers, starting October 1, 2009. Do you have it yet?
It's awesome!
Here are some of the 8" x 8" pages I've created using one of the Simply Scrappin' kits that are included in the software.
I inserted the photos and rounded them; added journaling to the layouts. And while playing with the various stamp sets included in the software, I found the cat silhouettes.
You can't even buy these cat images in rubber!


These pages are pretty much as they're provided.
The book was very quickly pulled together (but that's another story) and I was extremely pleased with the outcome!
And below are some pages I created in a 5" x 5" format, using templates provided in the software.


For this book, which was my first attempt at playing with the product, I concentrated on layout and learning how to manipulate the background papers and card stocks provided.
On some of the pages (none included here, unfortunately), I added a few embellishments - ribbon, bows, brads, eyelets, punch shapes - all included in the software!
I also rounded photos, deleted photo placements, or replaced them with something else, like journaling areas.
In general, I was just getting to know the product. And I have to say I'm very pleased with the ease of using it!
Hope you've enjoyed these snippets of what I've been doing with My Digital Studio.
This is only the tip of the iceberg!
You can make calendars, or cards, or create books/pages with video and audio embedded!
Stuff that's way beyond my ken right now, but which I'll be playing around with!
That's why it's being call Digital Paper Crafting - very versatile.
OH - and did I mention? It's both MAC and PC compatible! That's a BIG woo hoo from a MAC user!
The price is $79.95 plus shipping/handling and tax. That's quite inexpensive in terms of software. And the fact that it's both MAC and PC compatible is a huge bonus for those of us on "the dark side".
Let me know when you're ready to take the plunge and try it out! I'll be happy to order it for you!

Wednesday, October 28, 2009
Final Deals of the Week - October
Hey Everyone:
Just wanted to post the final Deal of the Week from Stampin' Up!
These deals of the week are available from October 26, 10 AM (MT) through SATURDAY October 31, 11:50 PM (MT).
Item Page Description Regular Price Special Price
116214 174 Princess Party Kit $15.95 $9.99
116213 175 Pirate Party Kit $15.95 $9.99
These look like cute sets in the catalog, but, me, I'm a Hands-on type of gal - I have to touch and feel it before it really inspires me.
I will be ordering at least one of these kits, strictly for that purpose!
And I know you're touchy-feely people, too. I think most people who tend to be artistic are. It's the textural thing!
If you'd like to have one or more of these sets, give me a call or shoot me an email! These are really cute ideas for birthday parties, and at these prices (30% off!), you can afford to buy more than one set of eight party kits!
I know these are great prices because I recently went to Party City to look for some ideas for my Hostess Appreciation event!
I plan to place an order Friday, so be sure to contact me so you don't miss out!
Here are a couple of gifts one of my customers gave me last week - just in case you need some last minute Halloween ideas


Irene made these using some of last year's Halloween Designer papers and stamps, but any items you have would probably lend themselves to this idea very easily.
She cut Top Note dies and popped up both the ghost and bat - she put some of the fancier Halloween candies in the 3x5 cello bags we sell. Really cute and pretty fast, if you need favors for that upcoming Halloween party!
Don't forget, Halloween is THIS Saturday, so you best hustle!
Speaking of Halloween, how's THIS for a ghostly picture!

Happy stampin'!

Just wanted to post the final Deal of the Week from Stampin' Up!
These deals of the week are available from October 26, 10 AM (MT) through SATURDAY October 31, 11:50 PM (MT).
Item Page Description Regular Price Special Price
116214 174 Princess Party Kit $15.95 $9.99
116213 175 Pirate Party Kit $15.95 $9.99
These look like cute sets in the catalog, but, me, I'm a Hands-on type of gal - I have to touch and feel it before it really inspires me.
I will be ordering at least one of these kits, strictly for that purpose!
And I know you're touchy-feely people, too. I think most people who tend to be artistic are. It's the textural thing!
If you'd like to have one or more of these sets, give me a call or shoot me an email! These are really cute ideas for birthday parties, and at these prices (30% off!), you can afford to buy more than one set of eight party kits!
I know these are great prices because I recently went to Party City to look for some ideas for my Hostess Appreciation event!
I plan to place an order Friday, so be sure to contact me so you don't miss out!
Here are a couple of gifts one of my customers gave me last week - just in case you need some last minute Halloween ideas


Irene made these using some of last year's Halloween Designer papers and stamps, but any items you have would probably lend themselves to this idea very easily.
She cut Top Note dies and popped up both the ghost and bat - she put some of the fancier Halloween candies in the 3x5 cello bags we sell. Really cute and pretty fast, if you need favors for that upcoming Halloween party!
Don't forget, Halloween is THIS Saturday, so you best hustle!
Speaking of Halloween, how's THIS for a ghostly picture!

Happy stampin'!

Subscribe to:
Posts (Atom)